Showing posts with label DIY. Show all posts

April 21, 2013

Floating ledges

So this is the first woodworking project I've made. It's just taken me 8 months to get them up! This are called $10 ledges, however, it was leftover wood from cutting, so essentially they were free. You can find the plans here. In addition to the glue, I used finishing nails to make sure the pieces were really on there good. The husband helped me put them up. Here are the ones I put in our bedroom.


Then the other one that's in the living room


These were super easy to make and they look awesome!! Every time I go into a thrift store, unique bottles always catch my eye. I've been collecting them since we've moved into the house, so it's nice to finally get them up and filled! And if you haven't noticed, I LOVE fake flowers. They are everywhere in the house. 
I haven't forgotten about my bookcase. It's half way done and is sitting in the garage. The final week of nursing school is upon me, so I've been a bit preoccupied with getting that finished.

Until next time,
Sarah

February 3, 2013

Next project

So I've decided to go with two identical bookcases for my next project. I not only need somewhere to put the many novels I have, but also somewhere for all of my textbooks for school! I was debating between the bookcases, a dresser or some nightstands. Seeing as I have never made drawers before, I think it would be wise to stick with what I know for right now. Anything that has drawers seems intimidating to me. Luckily, I have one of my favorite blogs to turn to. Shanty 2 Chic. These ladies have some AMAZING tutorials and advice to tackle those intimidating builds. They are the definition of DIY!! So if you have some time, be sure you stop by and check them out. After my first exam (eeek!!) of the semester, I'll be sure to update y'all on my progress.

Until next time,
Sarah

February 2, 2013

End Table

As promised, (I know it took SO long!!!) my end table is FINALLY done and in place. I did some different things than I did with my console table.
The weather here in South Dakota has been freezing. Everything in my poor garage is covered in saw dust. I've also been SUPER busy with my last semester of school. It feels like I spend my every waking moment studying or working at the hospital. Good news though, I'LL BE DONE IN MAY!!!

Okay, enough rambling, now onto what you actually came to read...

After finishing the table with my homemade stain, I didn't bother sanding it down before sealing it with polyurethane due to the weather. Maybe one day when it's nicer, I can take it back outside and actually finish it correctly. It doesn't look too bad, just not as good as my big table. The surface isn't as smooth as I wanted it to be.

You can find these plans here. I chose not to do the 2x2 X on each side. I decided to mimic the way I did my other table.
When I made my stain, I added a little more apple cider vinegar which made the wood more red.
As I did with my other table, I adjusted the measurements for this end table to fit in the space I needed it to. Not sure what my next project will be, so stop back by later to check it out!

Until next time,
Sarah

December 5, 2012

Christmas Time in the Willey Household

Apologies for not updating this in a while. I've been doing things here and there. Although it seems like time has gotten away from me, I have managed to get 1/4 of the way done with my Florida Gator's quilt. I've also started making some Christmas gifts for the family. Since we are poor college students, I've opted to make most of my gifts. I've worked on a couple of DIY decorations for the house as well.

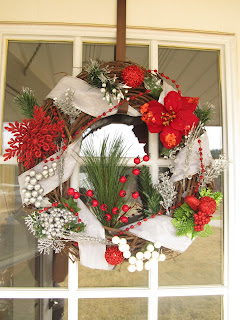
As you may remember my fall wreath here. Since I hot glued the things on it, they were super easy to take off. I reused the wreath for my Christmas wreath. I had the ribbon from last year's decorations. I got all of the little decorations at Hobby Lobby for 50%. So in all it cost less than $7 on this. I think it looks amazing!! I just cut the pieces with wire cutters, wrapped the wreath with ribbon and hot glued everything on it.


I had exams to study for this past weekend. While I was occupied, my husband, his best friend Brice and his girl friend and a good friend of mine, Sam, went out to her property and cut down a Christmas tree for us. It fits perfectly in the corner of the big room and looks awesome with the decorations on it!!


I also cannot leave out my mini Florida Gator tree on my awesome console table! Not to mention the amazing crocheted stockings for Eric and me, by my mother :)


My truss table is holding my big bowl of ornaments and greenery next to the front door. I wanted to put Christmas lights on this table, but unfortunately the nearest outlet is in the middle of the hall way. Either way, it still looks fantastic!


And finally, since I don't have a "proper" place for the Christmas cards that we receive, I had to look for another option. I took some leftover Christmas ribbon from the wreath and slung it over my cabinet doors. Simple!!


I have a ton of this ribbon! Just in case we get a lot of cards this year, I have more cabinet doors I can put more on.

I'll be stopping by the hardware store next week after I take my final exam for my next furniture project. Be on the lookout for my updates on that!!

Until next time,
Sarah

October 4, 2012

Thrift Store Ladder Turned Blanket Ladder

I finally finished my blanket ladder. If y'all remember a coupe of days ago when I posted that I found this ladder for $10!


Well, after much drilling, sanding, staining and such, here's my finished product:


This is the back of the ladder. I had to add the top two bars...which I had some 1x2s conveniently in my wood pile. This is the same stain I used on my hallway table.

And finally, the ladder is in use...just in time to display my (functional) blankets in the projected below 60 degree weather!!


Here's a quick story on all of my blankets...

The top of is, of course, my Gator blanket. For those that know me I'm a die hard Florida Gator fan...ever since I was little (I grew up in Florida) I always wanted to go there, but never had the test scores to get in. I still support them through the good, bad and ugly.

The second one down is my high school blanket. I went to Rockledge High and loved it. I also (still) support them in everything! Proud to be a Raider!

The third one is one that my mother made me in 2003. I was big into soccer, so naturally, soccer was the choice.

Finally, the last one is one that I made my husband while we were still dating. I believe we were still in high school.

I will definitely be enjoying these in the cold South Dakota weather.

Until next time,
Sarah

October 1, 2012

Somethings Just Happen

I think I lied before when I said I was going to work on my corner shelf. It's still standing in my dinning room, untouched. I don't want to do anything to it until I come up with how I want it to look. No use in having it sit in the garage forever while I figure it out!!

I did want to share the treasure I found at my favorite thrift store down the street from me!!! I have big plans for this puppy.


I picked this up for $10!!! I know at my local hardware store, these babies run about $50. I'll be using it for two different projects.

The first project will be using the backside of the ladder, or the part without the steps. I will be adding rungs to the top and where the shelf is. This will be my new blanket rack in my living room. Very useful for those South Dakota winters!

The second will be using the front of the ladder where the steps are. I'm going to put deep shelves on the steps and turn it into a "step ladder" shelf for the guestroom! (Hopefully) sturdy enough to hold family pictures and those odd and ends that somehow just fit in the guestroom.

I'll have to get help from the hubs to drill through the rivets that hold both pieces together at the top...and the top shelf; as well as the bracket that folds it in half. Followed by a good sanding down (everyone knows how much I hate sanding!!) and finally a nice stain and seal.


It seems like I've got a lot going on here with all of the projects I'm working on and want to work on. I've figured out the "Sarah" dimensions for my end table that will match my console table. Since I have a low sitting couch, I have to make it shorter. I've also decided to take the depth and width of the current end table I have an match it for the new one. For only the lumber, I can make one (I only need one...for now in this house) for under $20. If that's not a steal for one end table, I wouldn't know where to find one!!

I've also started making my families Christmas presents. I know some of my family keep up with my blog and I don't want to spoil their surprise! Maybe I can "secretly" post these in disguise so they won't know. Well I guess I'll figure that out when I have to.

That's all I have for you now. I will update again when I'm done with my ladder! I can't wait to share it with all of you!

Until next time,
Sarah

September 17, 2012

Fall Decor

Right after Labor Day, I got the itch to take all of my summer decorations down and to make it look like fall threw up in my house. So I ventured out to Hobby Lobby and Michael's...and spent a little more than expected. In my defense though, the fall garland and flowers were SUPER cheap and the vases I bought will serve more than fall decorations.
I replaced the summer flowers with fall flowers in my teapot.


This was fun! Got a bare wreath at Hobby Lobby for 2.99 and hot-glued various fall things on it.

With the abundance of pine trees here in the Black Hills, comes an abundance of pine cones. Not going out to the craft store and purchasing them. Nope, they are right in the backyard. I ended up about 2 miles from where we live and took a hike. I returned home with 2 plastic bags full of pine cones and a handful of different sticks and dried up grass. I baked the pine cones at 220 degree for 20 minutes. Let me just say when I took them out, it smelled like Christmas! I did the same with the sticks and grass. This kills whatever was living in the pine cones and pretty much dries up any sap on them. You have to be careful and keep a close eye on them...they can catch on fire. Here's my finished product.


What is really funny is the straw around the big pine cone bowl...that came off of a package. It was tied around to keep it closed! I think everything turned out perfect! Notice that I did end up getting some baskets for the bottom shelves of my table...they were 30% clearance at Target. What a steal!!

Until next time,
Sarah

September 15, 2012

Finished Console Table

I was SO excited to finally get this table into my house and share it with all of you! The materials were about $35 and with my hectic life and crazy schedule, I finished it in a little over a week. You can find the plans here on Ana White's website. If you haven't checked it out yet, I highly suggest doing so!

Here's my finished product.


I think it fits PERFECT in this little corner of the theater room. I'm going to look into getting some baskets for at least the bottom shelves so hid those pesky remotes and such that are sitting on the entertainment stand.
You'll also notice that my table is way off from what the plans have. Since I built it for this specific space, I shortened the length of it but also made it wider from front to back. The original plans would have run into into the door that's to the right. My old coffee table sat here, so I went off those dimensions.

What I learned:
If you do decide to tweak the plan, be sure to take into consideration that a 2x4 isn't actually 4 inches wide. The same goes for 2x6's (the bottom two shelves are made of 2x6 wood).

This was a fun project for me to work on since I could spread it out by doing a little bit at a time.

Thanks for stopping by and checking out my most recent piece!

Until next time,
Sarah

September 4, 2012

Console Table

It's the second week of school and already I've gone stir crazy. I have this weird need to always be doing something, I can't just sit still. Last week after my classes were done and the homework was finished, I wanted to get my hands on something. Something. Something to measure, cut, sand, stain, and seal. I just needed to decide what would fit in my budget.

I decided on a console table. But not just any console table. It was going to be custom, completely not according to the plans. This table has to fit in a space that's in the corner of my living room, where my glass coffee table presently sits. This console table will serve many purposes in this room. Not only will it hold some family pictures, wedding pictures, Bear pictures, but it can also hold those cozy blankets that are needed in the dead of our South Dakota winter. The shelves can also hold cute little baskets for random things we keep in that room (how about the one million remotes we have?!) So anyway, I went after school to the trusty Lowe's and picked out some (straight) pieces of wood. The original plan is 74 inches long (holy crap!), but I am cutting it down to 46 inches to fit between the wall and the french doors. The original plan also has the table 16.5 inches deep, however, I love the (actual) width of my coffee table I have now, so it will be close to 20 or so inches wide. I'm really, really hoping that my dimension turn out right. If not, we are going to have fun with some target practice. I will write up another post when I'm finished and it's finally in my house! But for now, it's patiently waiting to be cut in the garage as I finish dinner.

Until next time,
Sarah

August 26, 2012

Last Post for a While

Hello, all!

I just wanted to say a quick couple of words.

First, I forgot to show you this awesome sign that I made my bestie for her "25th" birthday.


 If you know her, you know it fits her. Ironically, we don't have a picture together, however I will provide you with this. This is some of our/her friends that attended her birthday at the beginning of August. You can see me on the very left with that weird look on my face, and her on the right with an equally weird look. We are cut from the same...however the saying goes. We were meant to be together is what I'm trying to say.


Anyway, I forgot to share her birthday present with all of you! Happy "25th" to you Lexi! I"m glad you enjoy your gift as much as I enjoyed making it for you <3

So my second thing I wanted to say is tomorrow, I go back to school. I'm very grateful to have finished as much as I did in a short summer of 4 months. I am also very thankful that Eric let me take over half of his garage, the whole house and a lot of time making our house what it is. I will try to work on new things as things settle down, but I can't make any promises as school always comes first. I will tell you that I'm planning on making the following items: end table that will fit the couch, a console, at least 2 night stands, and a dresser. I also plan on working on and finishing (who knows when I'll have the time): my master bedroom and the bathroom. I have big plans for both of these rooms, but I can't do anything to them until I paint them! I'm looking for a nice pale green for my room and a pale yellow for the bathroom. If I update/buy/build anything, I promise I'll blog about it!!

A special thanks to all of my friends, family, supporters, blog readers and everyone else! Feel free to drop me a line, email, or comment if you have any questions about anything I've covered in this blog or future blogs.

Until next time,
Sarah

August 25, 2012

Reclaimed Wood Headboard

This project was probably my most favorite so far. It was super easy to build and so much fun to stain!! I got the plans here. Ana provides dimensions for all bed sizes. I built myself the queen size for my master bedroom. Instead of getting (1) 1x8x16, I got (3) 1x6x5. For this particular size, the panels across measure to 5 foot. I also altered the height since my bed is placed under a window and the bottom of it measures 54 inches from the floor. I ended up cutting the legs to 50 inches. With the top pieces, it just fits under the window. I also added a 2x4 support board to the back of the panel to make sure the boards are flush. I had a hard time finding straight pieces of wood for this project, but I managed. The entire thing is put together with liquid nails glue and finishing nails, except for the 2x4 on top and back. For those, I used some 1-3/4 inch woodworking screws. I'll show you the progress pictures up to when I stain it. I have something homemade for that!

My nice pile of pine! $35.

Making progress!

Everything but the framing on the top and bottom.


So I was researching about a week ago on homemade wood stain. I came across this blog post. I stopped by Lowes on the way home and picked up a package of extra fine 00000 grade steel wool. Threw 2 pads in a quart sized mason jar and covered it with what little vinegar I had left and topped it off with about 1/4 of a cup of apple cider vinegar. I let it sit for 4 days, making sure the iron oxide gas could escape without blowing the top off the bottle. Everyday, I tightened the lid and shook it, then loosened the lid for the gas bubbles to be released. Before I used my homemade stain, I brewed some extra strength black tea and rubbed it onto the wood with an old sock. Please be sure to wear gloves to apply!! I'm not sure if it helped, but the wood grain really popped after it dried. I strained some of the liquid through a coffee filter so any leftover scraps of the steel wool wouldn't get into what I want going to brush onto the wood. While the solution was filtering, I sanded the whole headboard with a finer sandpaper. I usually use sandpaper that's a bit more coarse, but I wanted that smooth finish. I applied the solution with an old paint brush. Please be sure to wear gloves to apply!! It's amazing to see the color change from the chemical reaction between the acidic solution and the wood. Be sure to do this in a well ventilated area. Here's the progress pictures!

You can see my coffee filter at the top under the lid.

Here's the top of the filter, you can see the bits of leftover steel wool

First coat.

The tea created a tannis with the wood grain...making it pop.

Awesome gains

I started by staining the frame first, to the left is unfinished panel.

This is 5 minutes after application. Note comparison of the unfinished wood.

I'll be honest, when it started turning red, I was very tempted to sand it and start over. I'm so glad I didn't!

After application of the stain, I sanded the wood one more time, then wiped the dust off with a damp towel. I then took the same paint brush I used to stain it and coated the headboard with polyurethane. Let me tell you at how shocked I was at how AMAZING the wood looked! My husband and his friend were playing ping pong while I was polyurethaning and I kept shouting at how beautiful the wood was and how I was very happy with the outcome!!

Outside after sanding


This was after a damp rub down, you can tell a difference between just sanded and after the dust was taken away.
Gorgeous colors after polyurethane!!

Covered in polyurethane, gorgeous!

Here's the final product leaned up against the bed frame. I've discovered that when I was measuring for my bed, I failed to measure the width of my bed frame, so the headboard is a little too wide to be bolted to the frame. Let me know what you think!

The top is a little crooked...when I nailed the 2x4 down, I didn't have glue for it, so it likes to pull away from the rest of the headboard.

Awesome detail in the grains.
So here are my tips that I learned along the way.

Measure, measure, measure! You can't tell in the pictures but the frame where the bolts are supposed to be barely touch the legs on the headboard.

Get straight wood. The straighter, the better.

Wear gloves when staining the wood with tea, homemade stain and polyurethane. I didn't wear them when applying anything and this is what happened.


Let me tell you, it doesn't come off. However, I did manage to figure out how to get polyurethane off using olive oil. I rubbed my hands down with a decent amount, then washed with soap and water. I tried everything from nail polish remover, vinegar, extra strength GO JO with pumice.

Until next time,
Sarah

August 18, 2012

Finished table

It only took me two days but I've finished my table. I think it looks amazing. It's too tall to use as an end table. So I decided to put it in the "foyer" as a hallway table. I've been looking for one to go there for some time and I'm so happy that it worked out the way it did!! If you're wondering about the plans I used, you can see them here.

Bear booty made it in the picture!


I learned a couple of things about woodworking on the way.

When cutting the wood and it calls for off square, this means instead of the wood laying down flat, it stands up on it's smaller side.

Always double check what you're supposed to cut. Triple check it even! I ended up having to go back and re-cutting the wood because I didn't read that it said not parallel to the other side.

Use glue for the leg supports, otherwise they will turn.